Tuesday, 18 December 2012

Finished Projects

I love a finished project - it makes room for some more possibilities! The snowflakes have worked well.  I managed to do 16.  It took quite alot of patience but I think they were worth it...


A closer look...
 

and I've made smaller versions for my front door with 2 colours of ribbon twisted into a bow inbetween each snowflake...


I've also finished a dog jumper...


pattern to follow at some point.
 
 
 and finally I've created some Christmassy mittens for one of my daughters...

with very long sleeves...

The original pattern can be found at  http://www.lionbrand.com/patterns/L20103.html?noImages=which is a free pattern.  I've alternated 'twinkle' in white and a pink, added a picot row and chained 50 to make the arms longer.  I'm in the process of making some more in a fuzzy black and knitted for my other daughter.  Will upload when I've finished.

Finally, if I don't get another chance to blog before Christmas, wherever you are, whoever you're with and whatever may be, I send lots of well wishes for all.


Simply Knitting Patchwork Blanket - Patch 18

I'm making this entry simply because when following the blanket pattern in Simply Knitting mag issue 100 for Butterflies and Crocuses pattern for patch 18, I couldn't make sense of the pattern.  There may be en error as I tried several times and it still didn't make sense.   

Based on the previous patches in the pattern which allowed the position of Butterfly stitch B to latch onto the previous line of Butterfly stitch A, I drew rows 1-4 and 7-10 on graph paper as per the pattern and then arranged the stitches A and B (the directions of how to make these are in the magazine) in the positions that made most sense.  What follows are written directions of how I made patch 18.  You will need to have the subscribers edition of Simply Knitting Issue 100 or at some point the magazine may reprint the blanket in its entirety at www.themakingspot.com and the list of abbreviations found on p92 of the magazine.  The designer is Louise Butt and it's an interesting and varied pattern to do.


Cast on 60 and pearl a row as per directions in magazine.

Row 1 *k10, k2tog - yon - k1 - yon - sl1pwise - psso, k5* repeat from * till end of row.
Row2 P7, sl1pwise, p19, sl1pwise, p19, sl1pwise, p12
Row3 As row 1. Row4 As row 2
Row 5 *K15, Butterfly A* repeat till end of row.
Row6 *Butterfly B, p15* repeat till end of row.
Row7 *k5, k2tog - yon - k1 - yon - sl1pwise - psso - k10* repeat till end of row.
Row8 p12, sl1pwise, p19, sl1pwise, p19, sl1pwise, p7.
Row 9 As row 7 Row 10 As row 8
Row11 *Butterfly A, k15* repeat till end of row.
Row12 *p15, Butterfly B* repeat till end of row.

Repeat rows 1-12 till patch measures 20cm.

I've accidentally placed one of the holes made in the wrong position because I counted incorrectly - oooops.  I'm a beginner in knitting so it was a challenge to work out where each stitch would be but I am really happy with the outcome.  I only hope that it helps anyone who has come across the same issue.

Monday, 26 November 2012

Purple Felt, Finished Hat and Cowl and Goodbye Nikon D60

Happy seasons's greetings!  It's nearly the end of November so I think I can be a little bit Christmassy (even though I have done no shopping as yet).  I've nearly finished my snowflakes and will upload when I get some ribbon to hang them up onto the windows.  In the meantime I've reloaded my bamboo pad onto my computer and have had a little experiment with the art program to design a couple of backgrounds for this blog... feel free to use them if you wish.

 I'm sure in the months to come I will come up with some other appropriate designs for the seasons.

What else have I been up to?  I've finally tried my hand at felting!  I am a great procrastinator... mainly due to being afraid in getting something wrong and it turning out disastrous.  What a silly thing am I!  My washing machine is new so obviously I didn't want to stuff it up.  I have got extra insurance on it but I think I can risk a felt project or two :)  I set it on a Time Saver (a quick cycle make and model of machine is Beko WMB 61431W) and I am able to change certain settings on my machine.  Temperature at 60 degrees, I switched the spin to off, added a little softener, placed my knitted rectangle (100% wool and not mercerised/treated to withstand washing) into a pillowcase, a pair of jeans to encourage precipitation and set it on it's cycle.  After 20 min, I paused the cycle, switched it to spin and drain making sure the spin was off and after 2 minutes I could get my felt out and check it on the draining board.  It is obviously hot but nothing that I can't withstand.  I didn't think it was ready so all in all I ended up felting for about 50 minutes.  It was an experiment and I enjoyed the end result.

 And then I pinned it out onto a towel and it's drying as I type.

I would have been happy to felt for 10 minutes more to give it even more fuzziness but wasn't necessary.  The dimensions hardly shrunk at all.  The finished dimensions at it's smallest area is 14" x 13".  Enough to work with to make a pencil case/project bag/needle case.  I am rather chuffed with this but if I were to do it again, a would probably sew a few stitches to seal up the pillowcase so the material didn't fall out (only happened once).  I would definitely recommend an experiment!
 
I've also knitted my first hat with some free dpn's from Simply Knitting magazine issue 101 (January 2013).  Crikey I do do alot of advertising for Simply Knitting chuckle.  Well, when they give you free stuff and some worthwhile projects, I am likely to mention them.  As you can see...


As usual, I've opted for a different yarn (not only because I'm a cheapster but because I wanted a cream to go with my scarf and mittens) which was in my stash.  I have also added a crochet brim which I'm still not sure about.  I've used cornflour and water mix to starch the brim and placed over a glass bowl overnight...


And here I am with the finished article.


Not too bad for a first attempt.  I've also finished the Lisa Van Klaveren Cowl in King Cole Splash.
 
 
I promise no more photos of me for today lol.  You can find the cowl pattern above on my Ravelry projects http://www.ravelry.com/projects/TopazRiver/knit-look-crocheted-cowl-scarf-2.

 
Busy busy busy but nearly finished... I'm currently working on a springtime patchwork knitted duvet and the pattern comes in 4 parts with each month of Simply Knitting.  The first pattern is for 'Butterfly's and Crocus'
 
 
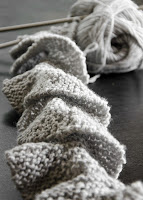
which is in issue 100 (December) and once I've finished the selected amount and sizes of this pattern I'll be able to start the 'Diamond Trellis' pattern.  I'm also doing another experiment.  I joined Knitting Paradise and someone was querying how to go about a fluted edge to a quilt from an 1870 pattern.  Yikes and crikes - it looks complicated and it's captivated me to give it a go.  In todays language my first attempt didn't turn out right but I have another theory as to how to go about it and will update you when I've figured it out. 
 
Future projects:
 
Design a pencil case/project bag with felt, embroider it with some sort of design
 
Finish and hang snowflakes
 
Finish butterfly and crocus patches, start diamond trellis
 
Get measurements to start a dog coat for sister's Jack Russel
 
Experiment with Victorian fluted edge for a duvet
 
Finish decoupaged egg decorations
 
And finally it's a very fond farewell to my Nikon D60 camera.  I never thought I would be so attached to an inanimate object but there you go.  It meant such alot but I had to let it go to raise funds for Christmas.  Some of the photos you can see at http://www.flickr.com/photos/celticemerald/sets/72157631966210831/  Good luck to whosoever owns it.  As soon as I held that camera it was for me... sigh... even when I let the post office have it, I knew I had along way to go to let it go... sigh.  Ah well, I have got my rather gorgeous Nikon D7000! 

Monday, 12 November 2012

Snowflakes and a Pencil Case Beginnings

For this week I'm following the 3 snowflake patterns that can be found in Simply Knitting's 100th issue or at their 'Making Spot' website.  I've used some show boxes, celephane and some pins to block them out.

 
There's a selection drying in pva glue as I type.  I can't wait to choose some festive ribbons and then hang them up at my windows.  Only another 19 to go!  How Christmassy am I feeling!

I'm also in the process of creating my first felted experiment.  I was given some Lithuanian 100% wool and somehow it got all tangled up.  So after looking at it for a few months, I've recently unravelled it and used a stockinette stitch (1 row knit, 1 row pearl).  It's a gorgeous colour.  The photo cannot do it justice (purples are notoriously difficult to photograph).


Once I've knitted all of the remaining wool, I'm going to place in a pillowcase and use a non-spin quick wash at 60 degree and see what happens!  If it works out, I'll be cutting it into a pencil case and stitching a nordic style design possible in white (yet to be decided upon).  I'll let you know how it goes!


Crochet Black Armchair Arm Covers

I've been away for a while visiting my sister and as you can see my black armchair arm covers are looking rather good on her settee!


This is best done inbetween projects as it is very repetitive. This is assuming you know a little about crochet so is ideal for a beginner.  As promised, here's the instructions which are in UK terminology.

Materials Needed :
1.25 skeins (i.e 125g) of King Cole DK Smooth yarn (or any other double knit) to make 17" x 15" cover
5mm crochet hook
Scissors and wool needle to thread in the ends.

Skills Needed:
Slip knot
Chains
Yarn Over (yo)
Double crochet  (DC) - insert hook into stitch/chain, yarn over, pull through stitch/chain, yarn over and pull through all loops on hook.
2 triple crochet together (2tr tog) i.e yarn over, insert into chain/stitch/space as indicated, yarn over, pull through chain/stitch/space, yarn over, pull through 2 loops on hook, yarn over, insert into same chain/stitch/space, yarn over, pull through, yarn over and pull though all loops on hook.
3 triple crochet together (3tr tog) i.e yarn over, insert hook into chain space, yarn over, pull through space, yarn over, pull through 2 loops on hook, repeat 2 more times, pulling through all loops on hook on the final pull through instead of just the 2 (makes more sense when you do it).

Instructions

Make a slip knot and chain approximately 70-75 chains to measure 17" (or aslong as you wish) depending on your gauge.

Insert hook into 2nd chain from hook to make your first DC and double crochet all the way along the chains.  Turn, chain 1, DC along double crochet stitches made in previous row to make a second row of double crochet.

Turn, chain 3, yo, insert into next 3rd chain from hook, yo,  pull through chain, yo, pull though 2 loops on hook, yo, insert into same chain, yo, pull through chain, yo, pull through all loops on hook - this is your first 2 triple crochet together.  Chain one, skip 1 DC stitch from previous row, (3tr tog into the next stitch, chain 1) repeat till end of row.

*Turn, chain 3, 2tr tog into 3rd chain from hook, (chain 1, 3tr tog into next chain space created from the previous row i.e when you chained 1 ) till end of row.*

* to * till armchair arm cover is nearly at desired size.  Finish by DC 2 rows.  Sew in the ends.


Sunday, 28 October 2012

A Skeleton Hat (Crochet)


These instructions are assuming you know a little about crochet.  I'm using UK terms with American terms in brackets.  This took approximately 4 hours to make for my daughter but may take longer for a bigger hat.      
 
Materials Needed: 5mm crochet hook
                                3mm crochet hook
                                thick yarn in white (aran weight would be ideal) approx 30-50g
                                thick yarn in black (double knit was used in this hat) approx 25g. 
                                Pair of scissors and a needle to stitch on the eyes, mouth and to stitch in the ends.
Skills Needed:        I think I've included all that's needed in the instructions - if you're not sure then just wing it (that's half of the fun and creativity) or have a good look at some of the skills on youtube as there are plenty of useful demonstrations to be found on there.
 
START HERE
 
Using a 5mm crochet hook and with a white aran weight yarn (or as thick as you want it) make a slip knot and create 5 chains, slip stitch through first chain.  Chain 3.
 
Half Triple Crochet (Half Double Crochet) i.e yarn over, insert through first chain made, yarn over and pull through chain, yarn over pull through all loops on hook.  Do this twice into the next chain and for all chains made (8 crochet stitches made).  Slip stitch into first HTC (HDC).  Takes a bit of practice but don't worry if it's not perfect.
 
2nd row - Chain 3, HTC (HDC) into each stitch twice, slip stitch into 1st chain of the row.
3rd row - as with 2nd row (approx 32 chains made).
4th row - HTC (HDC) once in every stitch and twice in every 4th stitch.  If you need the hat to be bigger, then make a 5th/6th/7th row with HTC (HDC) once in every stitch and then twice in every 5th on the 5th row, 6th on the 6th row etc this is only a guide and your own judgement on this is advised.
 
Once you have the hat wide enough, simply chain 3 at every new row to give it height and make 1 HTC (HDC) in every stitch which will not increase the hat any more but will create the side of the hat.   Continue with as many rows as needed then slip stitch through last stitch, cut yarn and slip knot through last stitch.
 
Measure approximately 10/11 stitches from back of hat, attach white yarn and HTC (HDC) 12 across, turn, chain 2, skip a stitch then HTC (HDC) across until 9 stitches made, turn, chain 2.  Continue until 7 stitches are made on 3rd row, 5 on 4th row, 3 stitches on 5th row and 2 on last row.  Cut thread and slip knot.  Repeat for other side to make ear covers.
 
Using black thread DC (SC) i.e insert hook, yarn over, pull through stitch, yarn over and pull through all hoops on hook - all the way around the hat.  Use a long length of black and white yarn and with each yarn, fold in half and thread through ear flaps and tie.  Pick up a black and white thread and twist until you are happy with the effect and tie a knot at the end.  Repeat with the other black and white thread. Join the two twisted yarns and twist them together, knot them at the end.   Do the same with the other ear flap.
Using black yarn and a 3mm hook, chain 5 and do as you did to make the hat but instead of HTC (HDC) use DC (SC) stitch.  Make about 5 rows.  Make another eye and  stitch them using your large eyed needle (a yarn needle is ideal) to the hat.  Using black yarn, create two diagonal stitches to make the nose.  Make a grim grin as shown by back stitching horizontal and vertical stitches.  Stitch all loose ends to make the hat neat.  Voila!


Have a very happy and safe Halloween!

Saturday, 20 October 2012

Rib & Twist Vest Completed, I Baked Herman & Plots to Decoupage

I've finally finished it!  It's been finished for a while but it took me ages to get around to stitching the final edge on the front, sewing in the ends and then I tried to shrink (yes, I said shrink - which didn't work) and block it not very successfully but I am generally pleased with my first ever item of clothing that I have ever knitted.  It's stretchy so I could have made this a size or two smaller and if I were to make this again, I would use the recommended 5mm needles in the pattern which can be found at the free Red Heart site.  I've done a bit of faffing about on photoshop to concentrate the eye on the garment...
I should be finished with my scarf this weekend and the armchair arm cover too... then what will there be to do?  I have a plan (stroking chin as if plotting to destroy the world with my craft creations mwah ha ha ha)... I've started to snip away at any spare magazines I can find.  I've got several 'Collect It' magazines which are very useful.
Once I've got a good amount of designs,I have an egg in mind to decorate and use as a Christmas bauble.  I'm armed with PVA glue, and no-one's going to stop me! giggle. 
 
Last weekend I could have killed the family with my Herman the German Friendship cake which is actually a sough dough, grown and fed with flour, sugar and milk over 10 days, then divided between friends (hence the friend bit in the name of the cake) which is forever and ever like a chain of cake, continued and therefore I don't know how old or how many cake generations the friendship cake was.  It was originally given to me by a member of the laugh and craft group I attend.  Thank you friend... it was safe enough to digest and was enjoyed very much
 

 Apples plus cinnamon and raisens - whats not to love?!  With a dollop of devonshire honeycomb ice cream it was a real treat.

Last night I got a shock.  Browsing flickr knitting, crochet and craft photos I noticed that one of my photos had had over 2000 hits!  I had entered the photo on the Favecrafts flickr site and they have used it in one of their email newsletters.  Wow, that was a pleasant surprise.  Those lacy mittens are gorgeous though.

Challenges for the next week
  • decoupage something
  • finish scarf
  • finish armchair arm cover
  • decide with daughter which cowl (a possible choice) she would like me to crochet, source material for it
  • source materials for Fair Lady Gloves on All Free Crochet and possibly start.
So expect some crochet, knitting and decoupage photos in the next blog.  Happy crafting people!

Sunday, 7 October 2012

Is Gardening a Craft?

These are the very first tomatoes that I have ever grown.  I had lots of fun today, taking them out of my large pot and preparing them.  Some were ripening...
and some needed time to ripen so my fella hammered 4 nails in the shed and after I had prepared the vines (leaves, twigs and the littlest of toms went into the recycling bin), I hung them up.
I don't actually eat fresh tomatoes.  Sad but true.  I have never liked them but I do envisage a tomato pasta sauce which I'm sure I will enjoy.  My fella has been eating them straight off of the vine for a few weeks now and has said they are really sweet so I reckon that's a success!  I've deseeded one tom and will sow some more next year.  As to whether gardening is a craft or not.... mmmm.... I suppose there's lots of gardening crafts like wicker work but is gardening a craft?  Well, whether it is or not, I just had to share giggle.

I've finished 3 lace mittens now - in cream, purple and black and a part from feeling a bit dizzy working in the round, I am thoroughly pleased with the results. 

I've started another arm cover for an armchair for my sister but in a different crochet stitch i.e working across in clusters.
It's inspired by the cluster beach bag pattern I started (and will probably finish next year).  Details on how to make this arm cover will be in the next blog.

I've received Simply Knitting issue 99 and the Custard Cream scarf by Kyoko Nakayoshi looks fab so I'm planning to knit it in King Cole Smooth in the natural colour as opposed to the yarn they suggested.  I figured that if I bought the yarn it says to use it'll cost me £27 on line so I thought the alternative King Cole Smooth, although acrylic, is sooooooooooooooo smooth it's dreamy and should cost £12 in total.  The arm cover above, is in the King Cole Smooth and I can't get enough of it. 

I've also got a few ideas up my sleeve for a possible Christmas present - I know, I know, I know!  I promised never to make something for someone unless they asked.  I admit I am a hypocrite.  But I saw it and my brain went 'ping' I know who would 'love' that!  I'm talking in riddles - not to worry, I am sure all will be revealed after xmas.  In the meantime, I've also been looking at some cushions as I think they would be a good way of getting some colour into my life, get some pattern practice and improve on my knitting.  Brain already filling up with possibilities so until next time - get creative!


Monday, 24 September 2012

Jane Burn's Lacy Mitts


I made these!  September's here and I'm prepared for the cooler days with these mittens.  I made the grey scarf mentioned in previous post, but I don't like it so I will have to have a rethink as to a future scarf project.  Back to the mittens... baring in mind this is the first time I have worked in the round (4 double pointed needles - crazy), first time for a lace pattern and making picot edging.  I've corrected the mistakes as much as I could (due to getting distracted many many times).  The pattern comes from October 2012 Simply Knitting magazine which I have now subscribed to.  It felt like my birthday when it arrived with 2 free bamboo needles and a 'Bergere de France' vac packed ball of wool.  I am in love with Bergere.  I can't help but be hypnotised with their unique and oh so feminine designs.  So, it was with great surprise to receive a ball of Bergere and to be able to work a design with it.  All that's needed is a 25g ball of 4ply yarn.  One daughter keeps nicking them and the other loves the lace work so I have agreed to make them both a set.  Each mitten takes 3 evenings at a couple of hours each.  The great thing about these is they are stretchy so what could fit an 11 year old could also fit a small to medium ladies hand too.
I have very nearly finished my twist and rib pullover in ocean blue.  Will need to stitch the front and block.  It's slightly big but I'm hoping it'll shrink a bit.  Will show you when it's done.  Aswell as some more mittens, I plan to start a black fisherman's jumper and make some more arm covers for my sister... a cluster crochet design might work better than the double crochet which nearly drove me mad.  I will have a think about it.  So I've got a very busy month or so and there's soooooo many patterns I wish to do but never have enough money.  Happy creating in my craft world.


Monday, 6 August 2012

Making Connections & Potato Chips

Such alot has happened to fill my days that it's only now that I've been able to dedicate some time between kids being at home for the holiday and the normal household stuff (as well as crafting of course). 

I decided to get all of the acrylic and watercolour paints that have piled up, out of the kitchen drawer and to use them in a very pleasant afternoon of 'Dance on Canvas' with my 2 girls.  We had the radio blaring away whilst standing up and creating whatever mess we liked whilst having a jiggley wiggley good old time.  This also included painting hands, faces and arms.  To see a child in creative bliss whilst jumping on a trampoline on a sunshine August day is definitely about living in the now.  Super.  Best day of the hols so far!  This session was a reaction against rules... my girls are heading into secondary school and when having a taster session of their new school, their art teacher threatened to tear up any work that didn't meet her standards.  Let that sink in for a moment. 

Mouth agape in shock?  I too was flabbergasted.  So that means any child with no confidence in their abilities will have even less confidence - snip off their nurtured wings and feed them to crocodiles why don't ya!  So instead of fearing colour and the canvas, we chose not to and had a blast!  Blowing raspberries at the 'f' art teacher.

As well as connecting with 'living in the now' moment and zen being (too hippy for you? giggle), my eyes have been opened to some more crafting possibilities on the Internet.  Not just possibilities but... dreeeeeams transmuting into a plan.  I think I may get carried away on a creativity cruise if I'm not too careful.  Let me share in some of these delights. 

Ravelry is a joy for crochet and knitting people and I have spent far too many hours looking at people's projects, favourites, making favourites and a library of patterns for future projects etc etc etc.  A site not to be taken lightly - you may be lost for a few hours. 

If you want to create your own design on material, try Spoonflower which is American based.  If, like me, you're in the UK, you can do a search for UK designers if you so chose, and see what people have designed and order material with their designs on.  I can't tell you how excited I got when I found this site.  My mind has jumped ahead to a time when I can sew and make some wonderful things with their designs or even my own designs.  Sigh... this time travel is highly recommended.  It would be nice to see some of those paintings my children have made on a cushion/quilt/curtains/headband etc etc etc.  A real personal touch for a gift.  Another site I am planning to look further into is The Fabric Press which is UK based. 

If, like me, you love silk but not the idea of the worms being killed in boiling water, you can check out a wonderful site called The Ethical Silk Company .  The silk worms live out their natural life cycle.  Raw & Organic Silk: Facts behind the Fibres is an enlightened article and a must read if you choose to buy silk.  If then you want to bask in some more creative glory then head to Folksy, 'A Modern British Craft' site.  You will squweel with delight at it's originality.  I have 'pinned' some of my favourites which you can check out at P-Interest.

Now for something a little more down to earth and at home... I've started knitting a potato chip scarf (or is it a crisp scarf or even an apple peel scarf?).  This is the first time I've knitted since I was a child.  I'd forgotten how to cast on so watched a video on youtube and soon got the hang of it.

Tuesday, 17 July 2012

From e-books to Grannys

I've discovered the joy of ebooks from the library!  If you're in England, so can you. How?  Simple. 

  1. Join the library if you have not already done so... TODAY
  2. Obtain a pin number for your use on the library website.
  3. When you get online, put the address of the library site which is on your card into the topmost address bar.  Sign in with your library card number and pin.
  4. There should be an option for ebooks - choose your books, download your books.
All that is needed is an adobe account and if you are downloading to your PC/laptop, you need to download their application.  It is self explanatory when you go through the library website.  I have a kindle rather than a Sony e-reader so it doesn't read the file format e-PUB and that is why I am downloading library books onto my PC.   When I have read, 'Blackberry for Dummies' , I will be able to do the same on my blackberry phone.  Whatever country you are in - check to see if you can use this service from your library as it is well worth it!
I've also had a fab weekend over at sister 'B' (for Brains - she wants to take over the world with her crochet empire), who has helped me greatly in the technique of crochet and I've managed to complete my very first granny square.

It's 3"x 3" approximately using a 4mm hook, variegated yarn in triple crochet clusters.  Not bad for a beginner.  So, I learnt to start a 'round', triple crochet and use clusters. Then I went one bigger...


It's 8.5 " x 8.5" and very colourful!  All in an evenings work.  I finished the granny square with a couple of rows along the edge of a double crochet.  One possible use for this would be a book bag.  Not sure yet so will keep it aside and have a think.  There's a fab little book with some wonderful knit and crochet bag designs that I recommend at least having a look at and that's 'Stitch Style Bags - 20 Fashion Knit and Crochet Patterns' by C&B Crafts.  A book I obtained from the library (real not technical).

Photo from Amazon. ISBN 978-1-84340-487-3.  If I ever do get to make any of these bags then I will post! 

At the moment I am concentrating on how to read a pattern and with alot of practise I am sure I'll get there.  Because of my sister's guidance and encouragement, she has whetted my appetite for more and a big thank you to her.  I think it important to connect with someone who is into the same craft as you as it encourages, inspires and educates us in that craft.  I may even join a 'Knit and Natter' group locally.  They are cropping up everywhere so there may be one near you at your local library or hall.  Now all I have to do is get up enough courage and confidence and join one.

In the immediate/soon to be immediate future, I plan to make a crochet hook holder (silk sounds divine), create the 2nd armchair arm cover for my sister 'A' which stands for my ace twinny, collect yarn for a bag and for a granny cushion I have in mind.  I better get to it!

Friday, 6 July 2012

From Buttons to Crochet

I am a dreamer.  I take an idea and run with it till it explodes and fizzles out in about 3 days.  This time, it started with a button - a button I refused to stitch on a shirt.  I have always refused to stitch buttons or anything else for that matter.  So long as I refused I was not caught up in the traditions and bindings that trap women into domestic hell/duty... no, not for me!  To stitch a button a few weeks ago, would have been the death of my freedom of choice and then I chose... to stitch it!  I can't tell you what a turn-around this was for me.  It was revolutionary.  I decided it was o.k to stitch that button not because I am a woman but because I wanted to.  Wow, what a revelation that was. 


I did a decent job, or at least my fella said it's ok and he used to have to sew his buttons on in the army and yes, he did a mock impression of how they checked for correct level and position of the button...  so because of his experience (and not coz he's a fella) I can give this a big tick and can now say I can sew on a button.  I'm sure I could sew on a button before when I made a rag doll as a child (its head may have fallen off  and the button eyes may have dangled precariously but it was definitely sewn) but as an adult sewing for practicality is a new arena.


It got me thinking.  Dangerous, I know, and so is the internet.  My little skill of sewing on a button wet my appetite for something more... a hobby or a... CRAFT!  I had a search on the internet as to what crafts actually mean and entail and discovered Kirstie Allsops collection of channel 4 programs.  Wow!  I can dream and dream and dream about lots and lots of projects except... I am a dreamer and therefore procrastinate rather than do.  I thoroughly enjoyed the series and gave me plenty of food for thought and I am sure will be a huge influence on any future projects.  It was actually a little you tube clip on how to make 'Kanzashi' that broke the spell.  http://www.youtube.com/watch?v=s5OyjujqPE4 A little flower made from scraps of materials, folded and sewn to make a hair ornament.  It was a perfect little project for me and my 11 year old daughter to try and together we had a really special time making it.


It's nothing much but meant so much.


This is what it's about.  Breaking the spell of NOT doing.  Not doing because I might fail or do a crap job.  Although I am reluctant, I am trying to break that trap and in little ways, I'm building up my confidence as a person that can do rather than can't.


One of the massive crafts that I was unable to grasp as a child was crochet.  AAAAAAAAAAAAH run away... even the word is scary giggle.  So it was a challenge.  If you had said to me 2 weeks ago that I would be crocheting I would laugh uncontrollably.  So I decided I'd had enough of stopping myself and decided to 'give it a go'.  I looked on the internet http://www.youtube.com/watch?v=eqca00LdmAc and found some you tube videos, watched them over and over again.  When it came to buying the materials to be able to crochet, I was scratching my head a bit.  What size crochet hook do i get and what wool?  I went to my nearest sewing/wool/craft place and asked.  I bought a really small hook at 2.5mm and a 4 ply cotton.  I did a practise piece, managed to make the chains to start it off, did a single crochet (apparently an American stitch - in Britain it's a double crochet I've since learned) which was tighter than a gnats arse.  Impossible.  So I got myself a bigger hook at 4.5mm and tried again.  I kept forgetting how to chain and ended up accidentally starting off latching on the cotton as if I was about to knit and then wondered why I couldn't remember how to make the crochet stitch... it eventually clicked and I had to take it all off the hook again and remade using a chain.  Much better!  I eventually made a wonky dishcloth which I have used.  How chuffed am I!


So, here I am a few weeks down the line and I am presently making an armchair arm cover for my sister which, if I'm honest, may or may not happen.  I'm using a black 4 ply cotton with my 4.5mm hook and it is taking me aaaaages.  My sister has 2 black leather sofas and she requires a 15 inch by 15 inch crocheted piece for each arm.  I've nearly finished my first one and it's taking me all week at about 1 and half hours per inch.  Looking a bit wonky too.  Apparently it's a common mistake of not counting the stitches properly and including the final stitch on the row so I will be going vertically to make it up to the 15 inch needed.  I should have got a thicker wool and then it wouldn't have taken half as long.  The lesson of this story is... buy a decent size hook at 4mm plus and some normal sized or even thick wool when you first do crochet.  I may only know 1 stitch but once I have finished the arm covers then I plan to learn the others and maybe even follow a pattern!  I've joined a couple of craft and crochet sites and have already saved aload of patterns.  Crochet has been cracked!


I would never ever never ever crochet something for someone as a gift unless I was exceptionally gifted and it looked as if the angels had spun the cotton from the heavenly clouds themselves and sang a sweet magical song and so lifting the silken threads, dancing in the rainbows sparkling dew to form the chains and stitches.  If someone requests an item, I will give it a go in the understanding that (1) it may not turn out to be what they expected and (2) it may not happen anyway.  My daughter is mad on Sponge Bob Square Pants and on a crochet site someone has done a fantastic Sponge Bob angel so of course she wants me to make it.  You never know, watch this space!